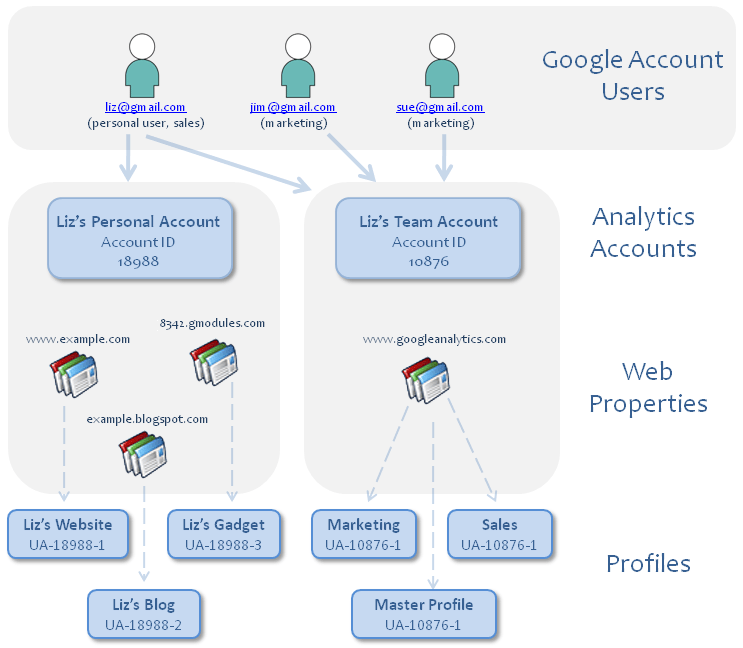
 A profile is a customizable layer in between the raw tracking data and the reports you see in Google Analytics. Profiles can be used to filter or limit the raw data so you only see the data you need in your reports.
If you want to collect data for just your company’s website, you can use a single account with multiple profiles to help get staff members from different departments the data that they need. For example, the Director of Marketing for a large hotel needs to monitor how prospective customers interact with the website as well as how employees are using the employee portal. He can set up a profile that filters out all internal traffic, and monitor site interaction, ranging from time on site for new visitors to sales, to share with the sales team. He could also set up a profile that filters out all external traffic and share these reports with the Manager for Internal Communications and the Human Resources department, in order to better assess how staff members access the website.
Some important things to keep in mind:
- User access is also set at the profile level, so you can restrict the data that account users have access to as necessary.
- Other Google Analytics reporting tools, such as Goals and Advanced Segments, are all applied to individual profiles. Using our earlier example, the Director of Marketing may want to set up a hotel booking as goal for the external-traffic only profile. Different goals could be established for the internal-traffic only profile.
- Google Analytics creates an unfiltered profile for every website that you add to your account. Do NOT delete or add a filter to this profile. Data can never be retrieved once it has been filtered. A much better option is to set up multiple profiles and customize each one.
For most websites, I recommend setting up three profiles to start:
- The default, unfiltered profile. Again, you want to leave this profile untouched so you can always revert to the raw, unfiltered data if necessary.
- An external traffic only profile, filtering out the IP addresses or IP address range of your business. This profile is a great place to start when you’re making decisions about the effectiveness of your public-facing website.
- A test profile. If you want to experiment with adding additional filters, try them out using this profile. Again, once data is filtered at the profile level, it cannot be retrieved.
Note: you will need Administrator-level access to your Google Analytics account in order to set up profiles.
How to Set Up a Profile
- Click Admin in the top right in the menu bar from any Analytics page.
- Find the account that contains the URL or what Google Analytics refers to as a property to which you want to add a profile.
- Click the property to which you want to add a profile.
- Click +New Profile.
- Select either Web or App.
- Enter a name for the profile. I recommend being descriptive so you know what this profile is for.
- Select a Reporting Time Zone. Choose a country/territory and standard time zone. Note that Changing the time zone only affects data going forward, and is not applied retroactively. If you change the time zone for an existing profile, you may see a flat spot or a spike in your data.
- Click Create Profile.


