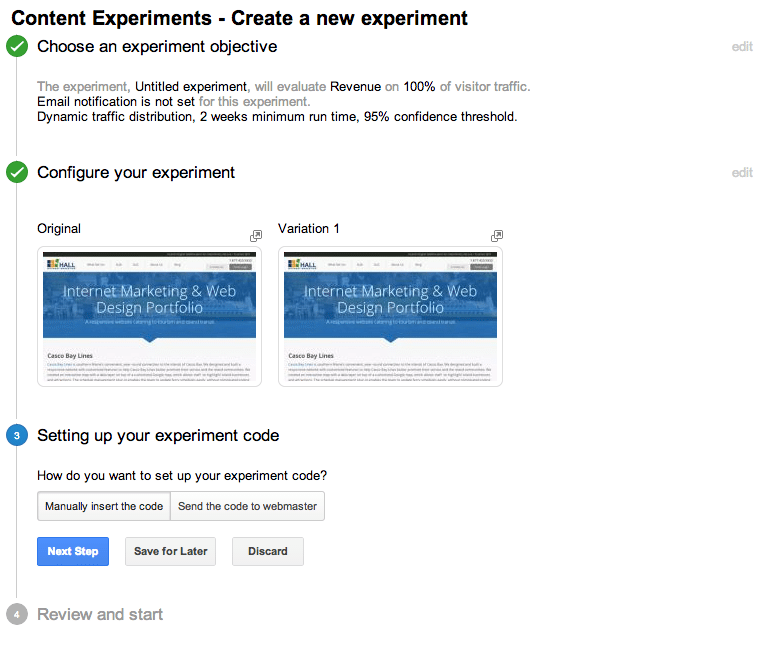
Ever wanted to run a Google content experiment across an entire section of your website? This can be extremely useful if you want to test changes on your product pages or another section of your site that has multiple pages of the same type.
Step 1: Select Experiments under the Behavior menu
Then click “Create Experiment” to get started.

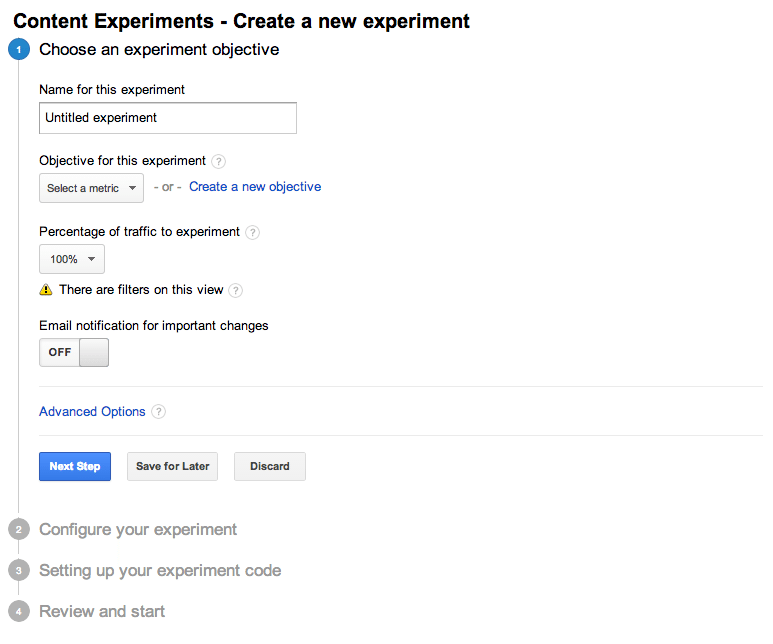
Step 2: Choose an experiment objective
This is all the usual basic stuff, so if you’re familiar with content experiments, feel free to jump ahead to step 3.
You’ll need to set a name for your experiment, as well as an objective – or in simpler terms, what should determine the winner of the experiment. On an e-commerce site, you’ll have some easy options around revenue to choose from. For other types of tests, you can create a Goal in analytics (not covered here) and set the winner to be determined by which variation completes that goal more frequently.
There’s some more advanced options here, but generally I’d recommend leaving everything else as-is unless you have a specific reason to change things.
Step 3: Configure your experiment
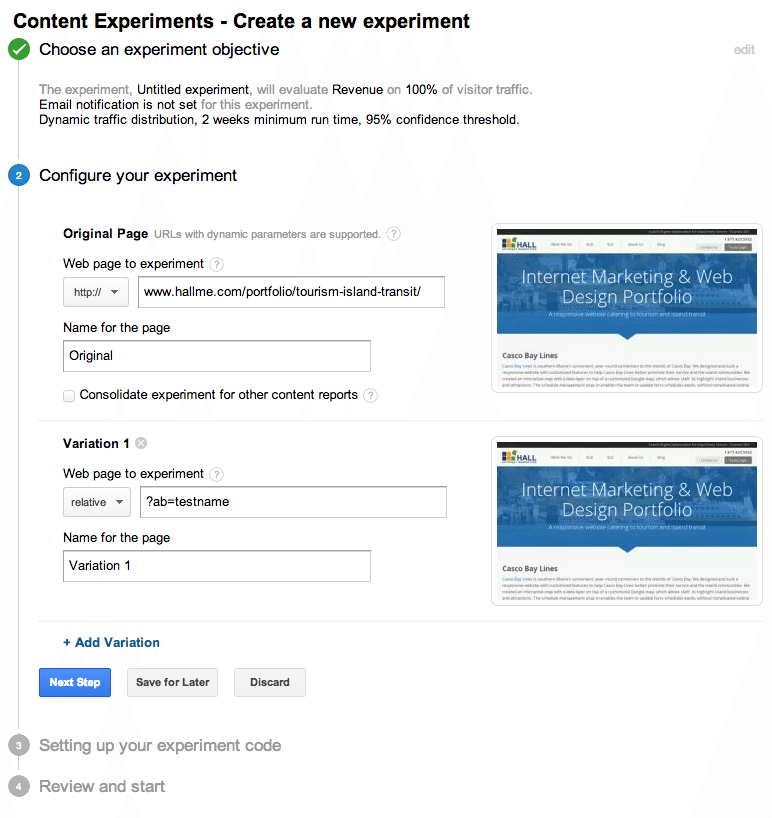
Here’s where the fun begins. In order to setup a test that runs on multiple pages, what we’ll actually be doing is testing against relative urls. Google has some documentation available for this feature, although it’s a little vague on the details. The confusing part is that regardless of whether you’re testing variable URLs or not, you must set a specific page as your “Original Page”.
You’ll see below we took one of the portfolio pages from our own website and entered it below for a theoretical experiment we’re running on our portfolio pages only.
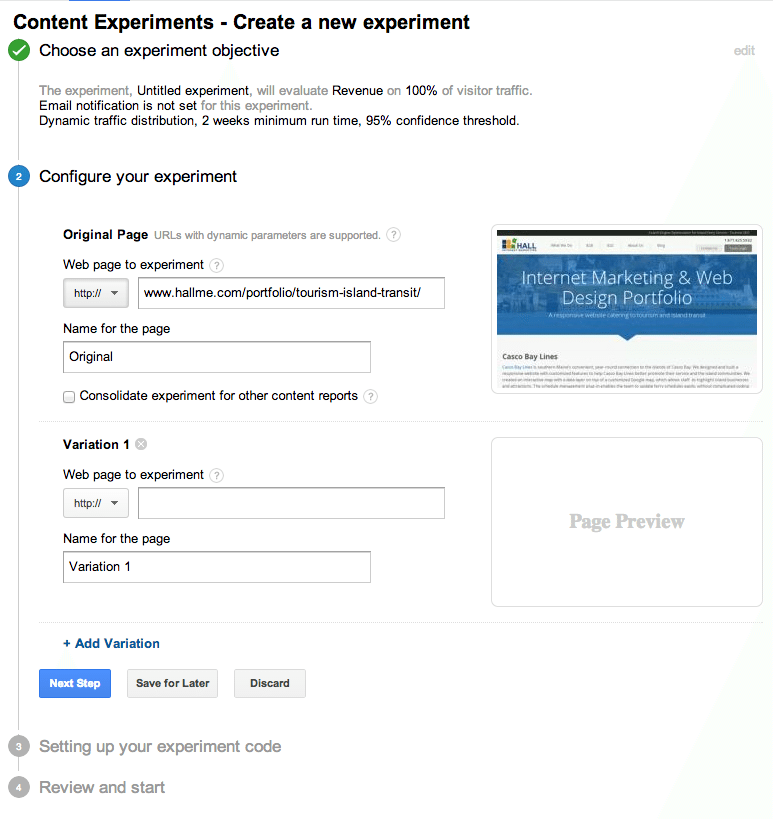
Setting Your Variation
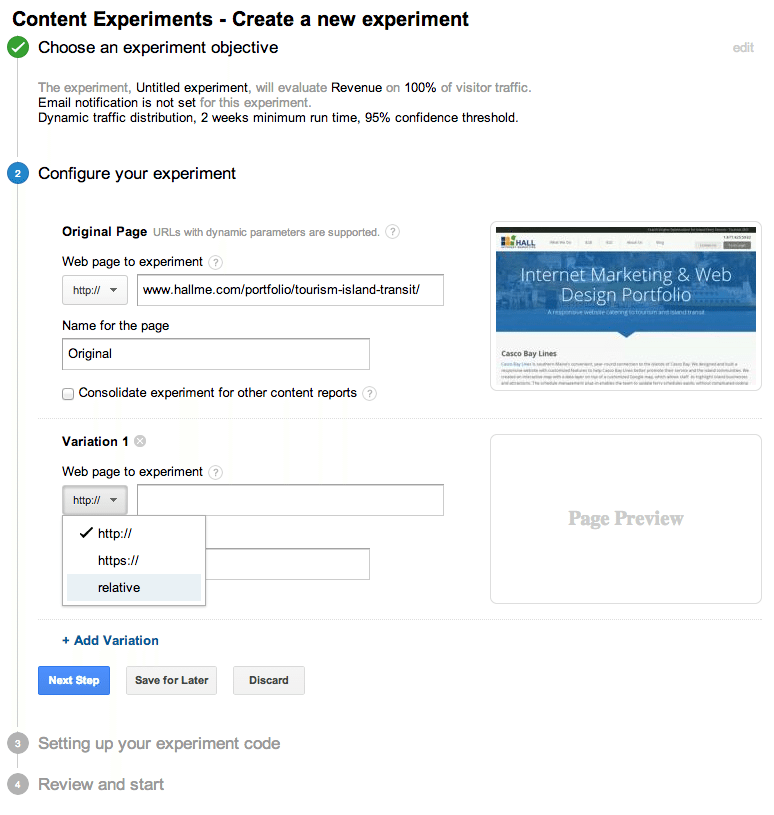
Now we setup our variation to use a relative URL that will apply to all of our pages (not just the original page we had to enter above). I’m not quite sure the reasoning behind why Google has it setup like this, but I’m willing to accept the quirks of the system in order to get meaningful data.
*Make sure you select the “http://” dropdown and set it to relative for the variation in order for the experiment to work correctly.
Once we put in our relative URL, Google will pull the variation of the page and we’re ready to move on to the next step. In this example, I’ve used a GET Variable in the URL path to specify my variation. We’ll talk a little bit more about using that method with WordPress below in step 4.
Step 4: Setting up your experiment code
Now that you’ve correctly setup your content experiment in Google Analytics, all you need to do is add your experiment code to your pages. Keep in mind that any page you paste this code onto will have the experiment run on it, so it’s important to be careful where you’re placing it to avoid issues on your site.
In WordPress, it’s easy to configure the code to show only on certain pages. For example, if you’re using WooCommerce and want to run the experiment on all your product pages, you would use something like the following:
<?php if(is_product()) { ?>
Paste Google’s Experiment Code Here
<?php } ?>
Then on your product page template, wrap your code changes in the following:
<?php if($_GET[“ab”] == ‘testname’) { ?>
Your code changes here
<?php } ?>
This will check the URL to see if ?ab=testname is included and if so, include your code changes in the page. Since Google will automatically push users to the original or variation page, that’s all you need to do to setup your experiment!
