 WYSIWYG (WIZ-ee-wig) or “What You See Is What You Get” is just another name for a text editor. It can interpret code, media, and images and display them similarly in the editor as they will appear on the front-end of the website. In a previous post I outlined ten tips for using the WordPress editor. In this post I will build off that foundation with ten additional tips to add to your WordPress skills and understanding.
1. Sticky Toolbar
The toolbar will “stick” to the page while scrolling so it is always available no matter what size the content is. This functionality was recently added in the WP 4.0 release. It has proven to be extremely helpful.
2. Formatting Options
A properly formatted blog post can entice a user to read it by allowing for easily scannable content and digestible chunks of information. WordPress makes a number of formatting options available by default in the editor. They should be standard icons familiar from most text editors but if in question, hovering over the button will reveal its name. The alignment buttons (left, center and right justify) may also be applied to your text.
Inline Elements – These elements are displayed inside block level elements. Here are some examples of inline elements.
- Bold
- Underline
- Italic
- Links
Block Level Elements – These elements are typically represented as a “block”, meaning they fill the entire area of their parent container. By default they begin on new lines. Here are some examples of block level elements.
- Paragraph
- Heading 1
- Heading 2
- Heading 3
- Heading 4
- Heading 5
- Heading 6
3. Lists
List elements are also block level elements. A bulleted list is called an “unordered list” and a numbered list is called an “ordered list”. Nested lists can be created on each list item with the “increase indent” button and removed with the “decrease indent” button.
- This is an ordered list item
- This is another ordered list item
- This is a nested item
- And another nested item
4. Keyboard Shortcuts
Bold (Control/Comand + B)
Underline (Control/Comand + U)
Italic (Control/Comand + I)
Heading 1 (Control/Comand + 1)
Heading 2 (Control/Comand + 2)
Heading 3 (Control/Comand + 3)
Heading 4 (Control/Comand + 4)
Heading 5 (Control/Comand + 5)
Heading 6 (Control/Comand + 6)
5. Single and Double Line Spacing
This seems fairly straightforward—double spaced (Enter), single spaced (Shift + Enter). There are, however, certain caveats with this “tip” when dealing with block level vs. inline elements. For instance defining a Heading 2 on the first line and a Heading 3 on a single spaced line below will result in Heading 2 changing to a Heading 3. This is because both elements are block level.
6. Special Characters
A list of useful html characters can be easily embedded into the content with the “special character” button (the horseshoe looking thing). It includes ellipsis, bullets, copyright symbol, language characters, etc. Play around with these yourself and explore the full list of available characters.
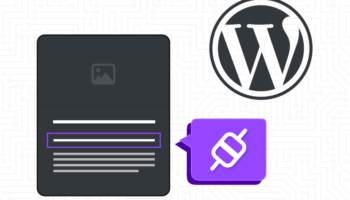
8. Shortcodes
Shortcodes are native to WordPress and have been around since WP 2.5. They are represented in the editor with an opening “[” and a closing “]” and can include attributes. Shortcodes allow for complex functionality that is both reusable and very easy to implement. They are defined in themes and plugins and a small number are included by default in the WordPress core including: audio, caption, embed, gallery, and video. These shortcodes used to be represented with brackets but WordPress has since evolved and these select shortcodes automatically get rendered visually in the editor.
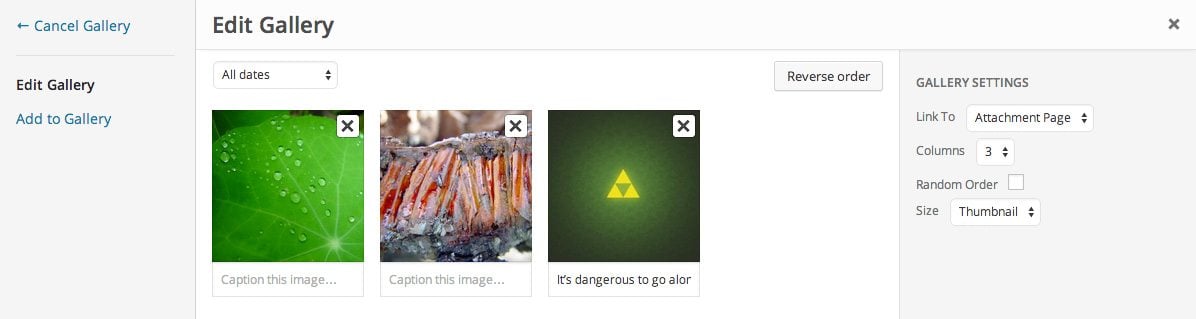
8. Image Gallery
Image galleries are represented as a shortcode as explained above. As of WP 3.9 they are visually rendered in the editor. Galleries are added much like images, through the “Add Media” button at the top of the editor. Once in the media popup, select the “Create Gallery” tab on the left and then select a group of images from the media library or upload new ones to comprise the gallery. When finished, click the button “Create a new gallery” in the bottom right which opens a new popup called “Edit Gallery” where you can rearrange the order and define some settings.
9. Audio Playlist
The process of creating an audio playlist is nearly identical to creating an image gallery. Instead, click the tab “Create audio playlist” inside the media popup. Select audio tracks and define your settings and easy-peasy. Below you can see how it renders in the editor as well as how it would look on the front-end of the website.

10. Extending the Editor
By default, WordPress includes a streamlined sampling of buttons in the editor but there are additional ones in the WP core that can be activated through themes or plugins. Customized buttons can also be created to facilitate specific functionality. See here for a list of plugins for extending or customizing the editor.
View part one of “10 Tips for Using the WordPress WYSIWYG Editor”.